
MADLevels
Improve entry timing and avoid false moves
Detect subtle order flow interaction most tools miss
Used by over 100 traders since 2024
Real Trade Examples
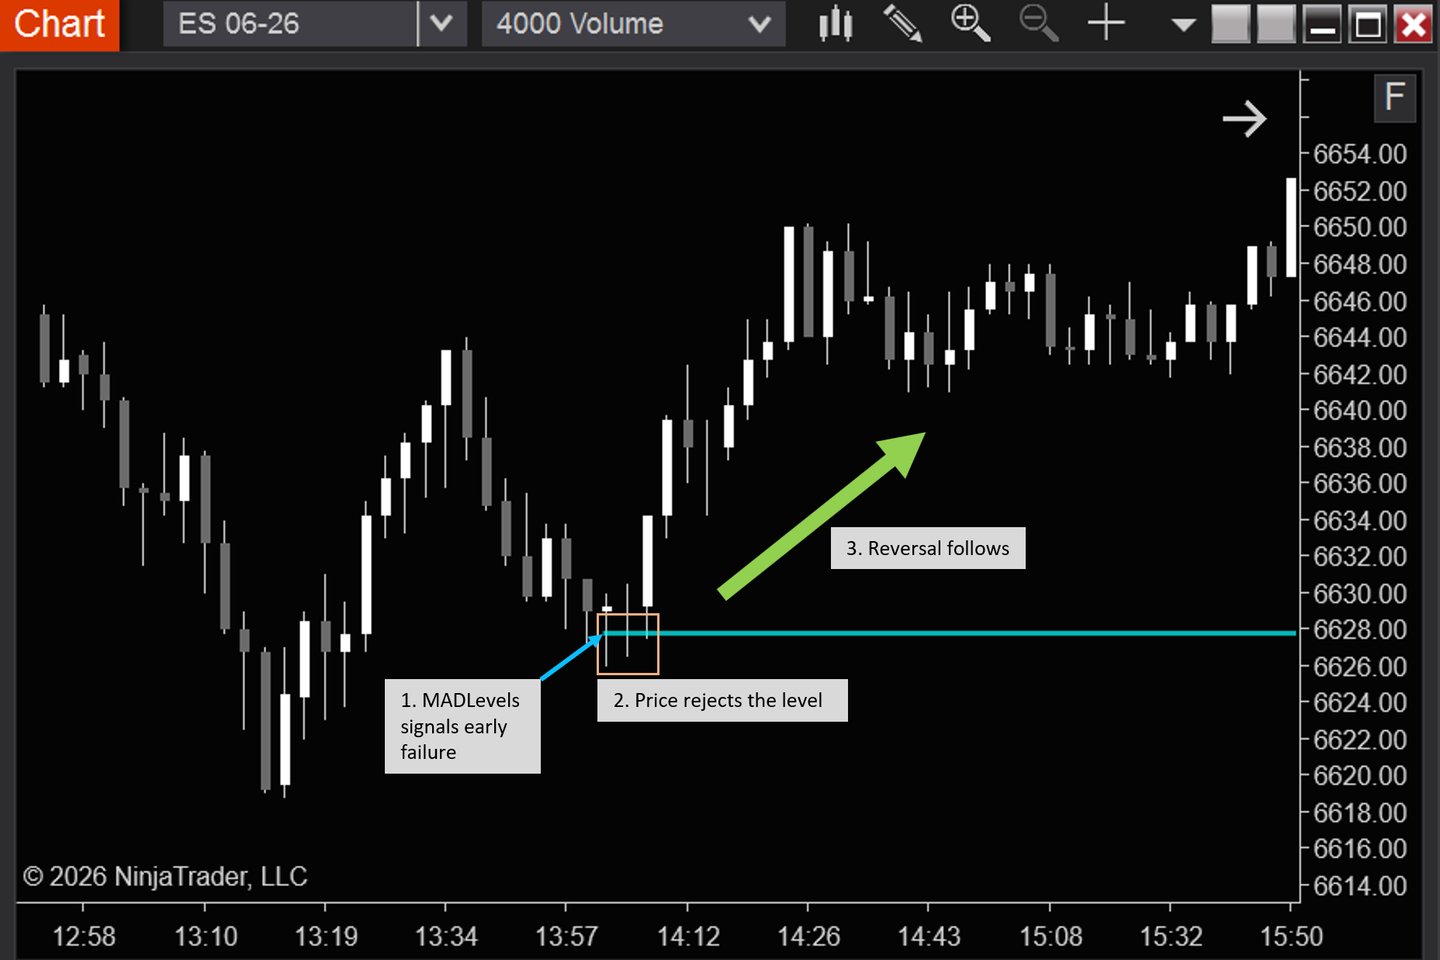
MADLevels identifies early failure as sellers lose control. Price rejects the level, and a reversal follows.
MADLevels highlights early signs of failed moves. These examples show how traders combine it with price confirmation to execute.
Example 1 - Reversal (Trapped Sellers)
Example 2 - Continuation (Failed Pullback)
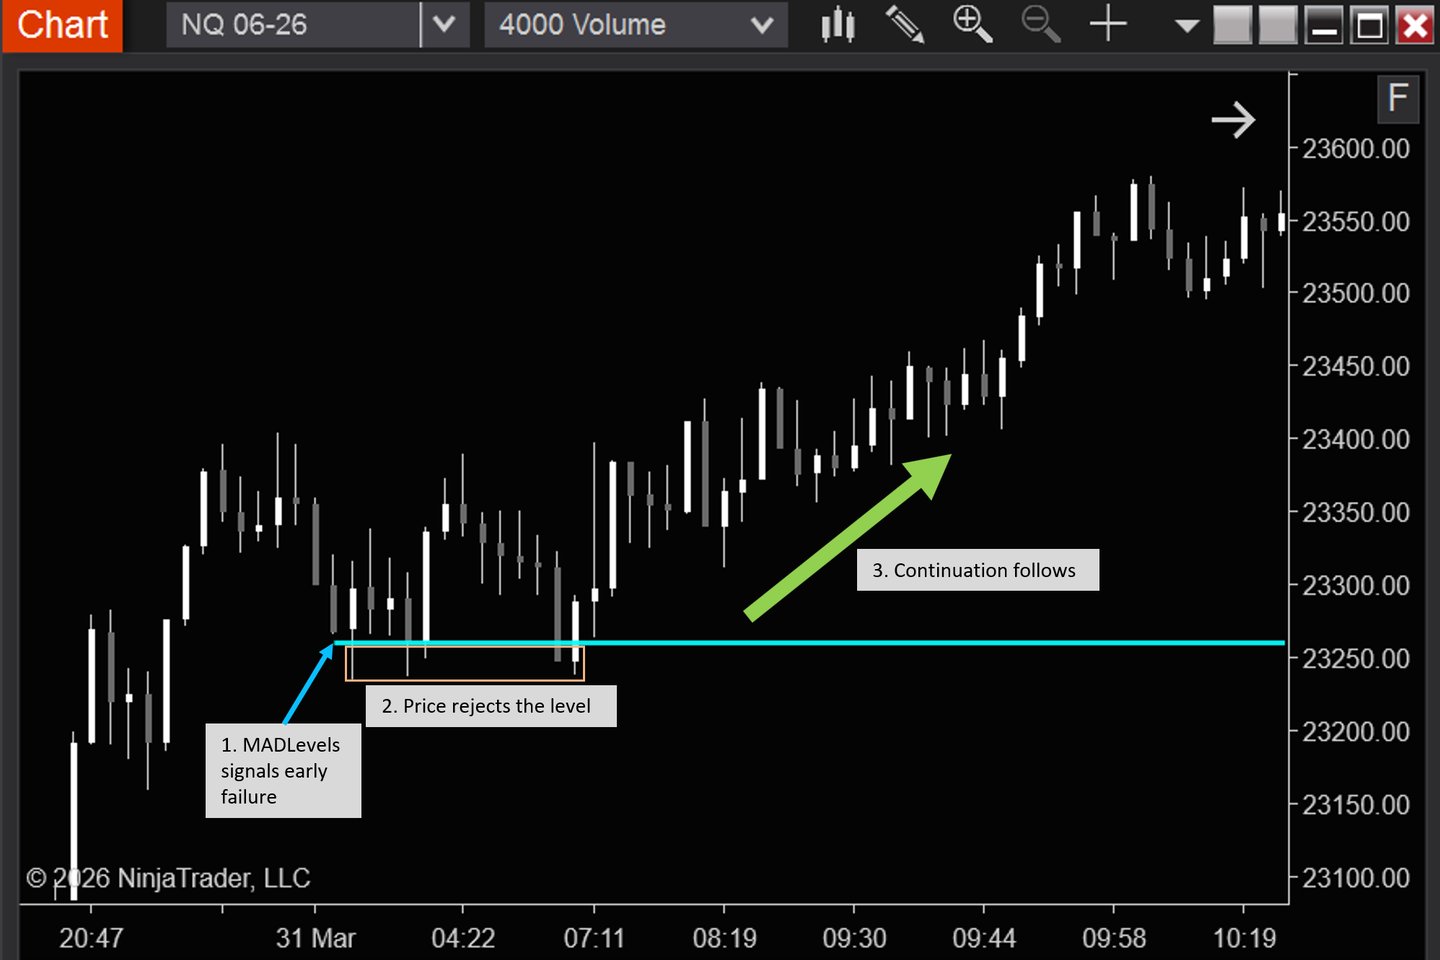
MADLevels identifies early failure as sellers lose control. Price rejects the level, and the trend continues.
What is MADLevels
MADLevels identifies levels where price is likely to fail or react.
Based on real-time order flow interaction, not aggregated price data
Highlights when price cannot continue despite ongoing activity
So you can improve entry timing and avoid false moves
Why MADLevels
Avoid getting trapped in false moves
Identify where price is likely to fail or continue
Reduce noise and cognitive load in reading order flow
Focus on key levels instead of processing raw data
Avoids tunnel vision of a small segment of the market
Maintain a clearer view of overall market context
Improve consistency in your entries
Why this is Different
Most tools rely on aggregated data across price levels
This can hide subtle absorption and failed moves
MADLevels detects order flow interaction as it happens
Instead of relying on aggregated price data
So you can identify where price is likely to fail or react more precisely
How MADLevels Works
Mechanism
Tracks real-time interaction between aggressive and passive orders
Identifies when price cannot continue despite effort
Marks levels where these interactions occur
How traders use it
1. Detect early failure
2. Confirm with price
3. Enter the trade